Linux Disk Management
Prepared by: Anwer Sadath Abdul Muttaliff
Prepared by: Anwer Sadath Abdul Muttaliff
This project demonstrates Linux disk management using tools like lsblk, fdisk, LVM, and mount. The goal is to:
/etc/fstab.Use the lsblk command to list all block devices and their partitions.
$ lsblk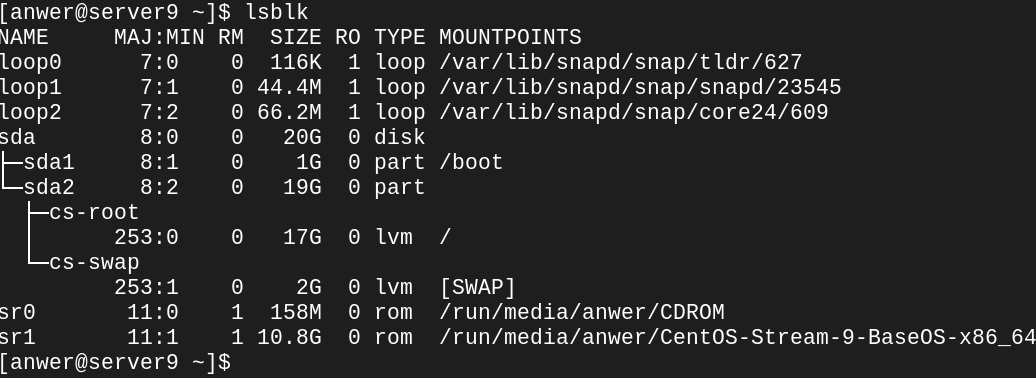
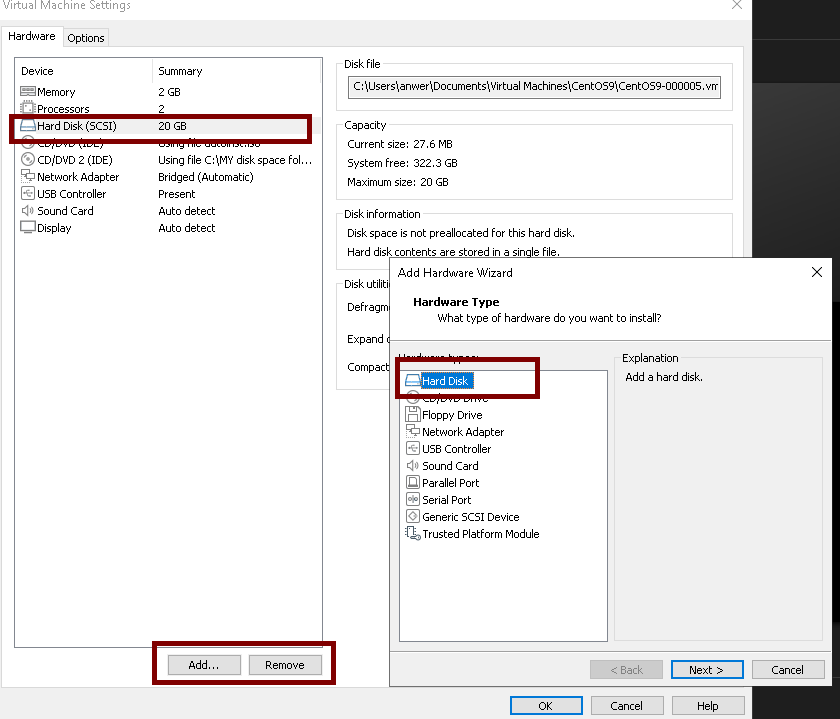
Add a new 30GB hard disk to the virtual machine and restart to detect it.
Verify the new disk using lsblk and fdisk.
$ lsblk
$ sudo fdisk -l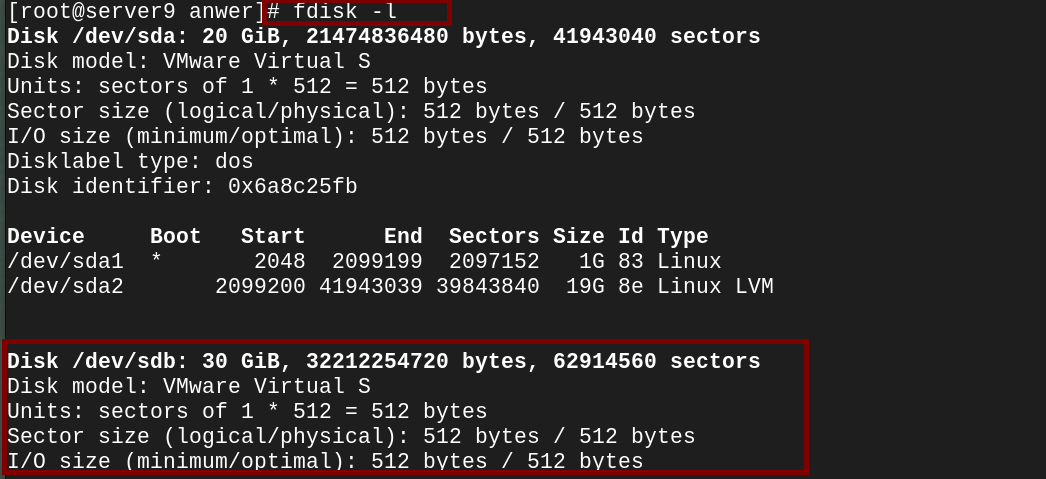
fdisk to PartitionUse fdisk to partition the new disk (/dev/sdb).
$ sudo fdisk /dev/sdb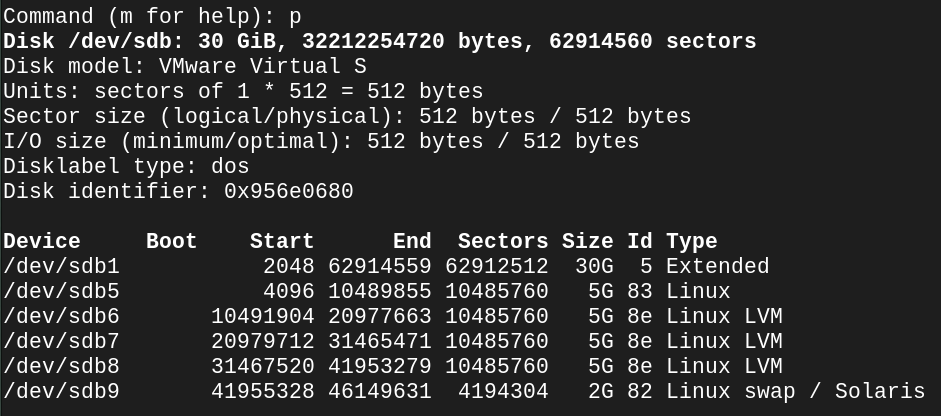
Reload the partition table to apply changes.
$ sudo partprobeInitialize the LVM partitions as physical volumes.
$ sudo pvcreate /dev/sdb6 /dev/sdb7 /dev/sdb8Create two volume groups: hr_vg and finance_vg.
$ sudo vgcreate hr_vg /dev/sdb6
$ sudo vgcreate finance_vg /dev/sdb7hr_vgExtend hr_vg with an additional partition.
$ sudo vgextend hr_vg /dev/sdb8Create logical volumes for HR and finance.
$ sudo lvcreate -L 5G -n hr_lv hr_vg
$ sudo lvcreate -L 5G -n finance_lv finance_vgext4Format the partitions with the ext4 filesystem.
$ sudo mkfs.ext4 /dev/sdb5
$ sudo mkfs.ext4 /dev/hr_vg/hr_lv
$ sudo mkfs.ext4 /dev/finance_vg/finance_lvCreate directories for mounting the partitions.
$ sudo mkdir -p /mnt/hr /mnt/finance /mnt/dataMount the partitions to their respective directories.
$ sudo mount /dev/sdb5 /mnt/data
$ sudo mount /dev/hr_vg/hr_lv /mnt/hr
$ sudo mount /dev/finance_vg/finance_lv /mnt/financeInitialize and enable the swap partition.
$ sudo mkswap /dev/sdb9
$ sudo swapon /dev/sdb9/etc/fstab/etc/fstabAdd entries to /etc/fstab to ensure partitions mount on boot.
$ echo '/dev/sdb5 /mnt/data ext4 defaults 0 2' | sudo tee -a /etc/fstab
$ echo '/dev/hr_vg/hr_lv /mnt/hr ext4 defaults 0 2' | sudo tee -a /etc/fstab
$ echo '/dev/finance_vg/finance_lv /mnt/finance ext4 defaults 0 2' | sudo tee -a /etc/fstab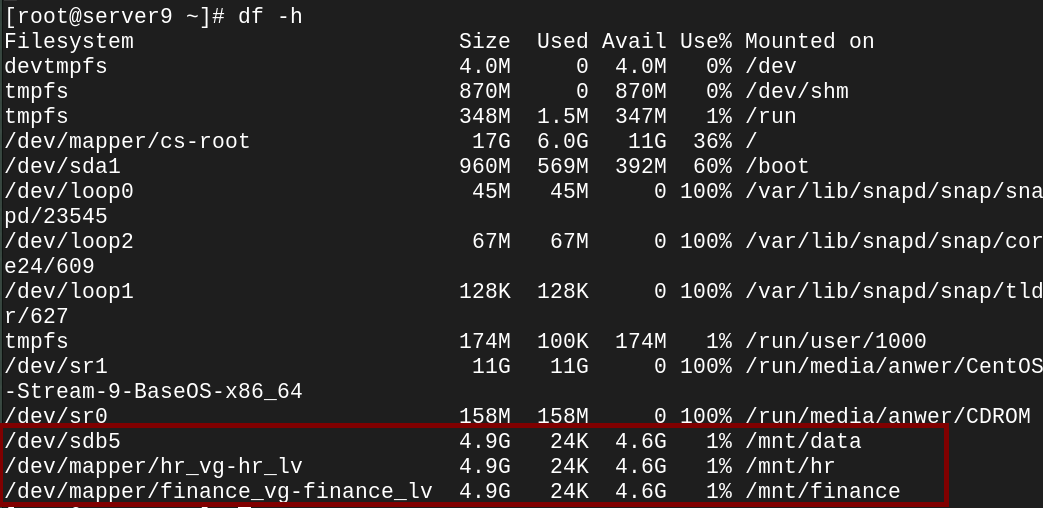
$ echo '/dev/sdb9 none swap sw 0 0' | sudo tee -a /etc/fstabCheck mounted partitions and swap usage.
$ df -h
$ free -m