AWS EC2 Launch Guide
Prepared by: Anwer Sadath Abdul Muttaliff
Prepared by: Anwer Sadath Abdul Muttaliff
This guide provides step-by-step instructions to launch a website on AWS EC2. It covers:
If you don’t already have an AWS account, sign up at aws.amazon.com.
Go to the AWS Management Console.
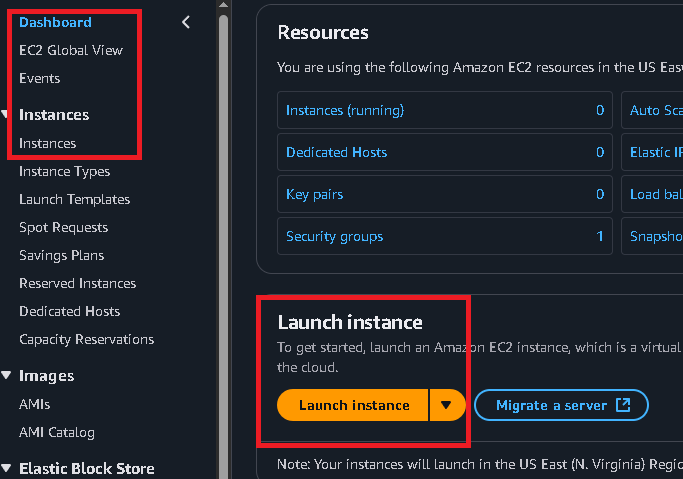
Type "EC2" in the search bar and click on EC2.
Click on Instances in the left sidebar, then click Launch Instances.
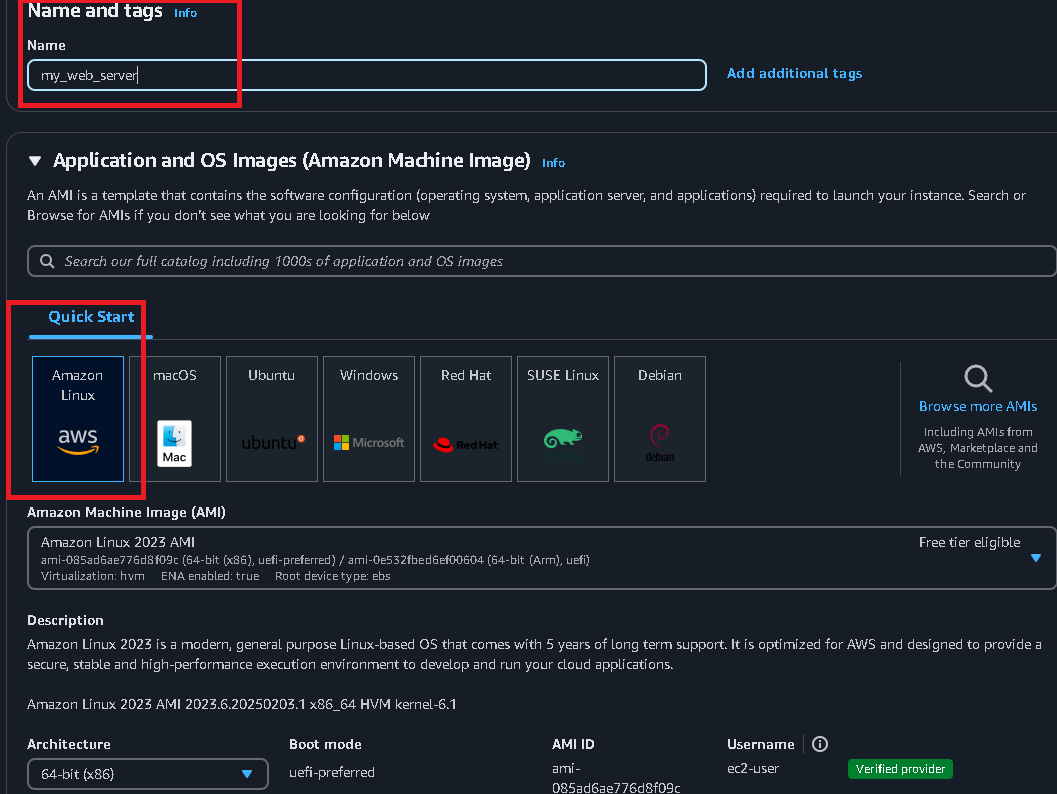
Name your instance my_web_server and select Amazon Linux as the AMI.
Select the t2.micro instance type (free tier eligible).
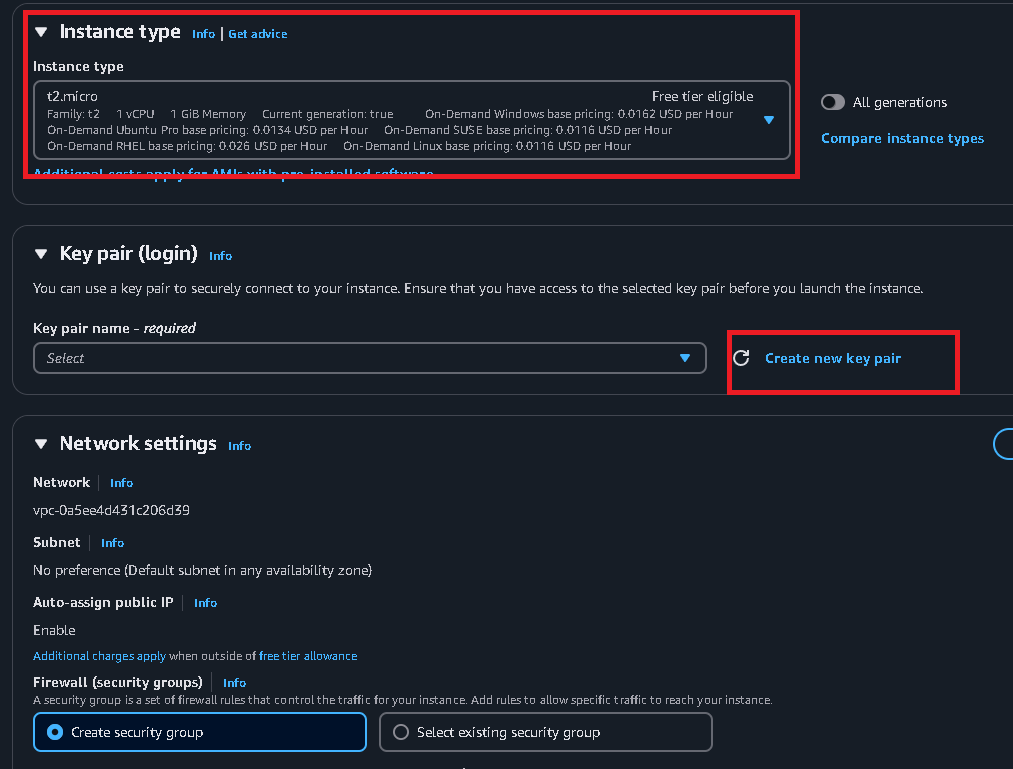
Create a new key pair and download the .pem file. This will be used to connect to your instance.
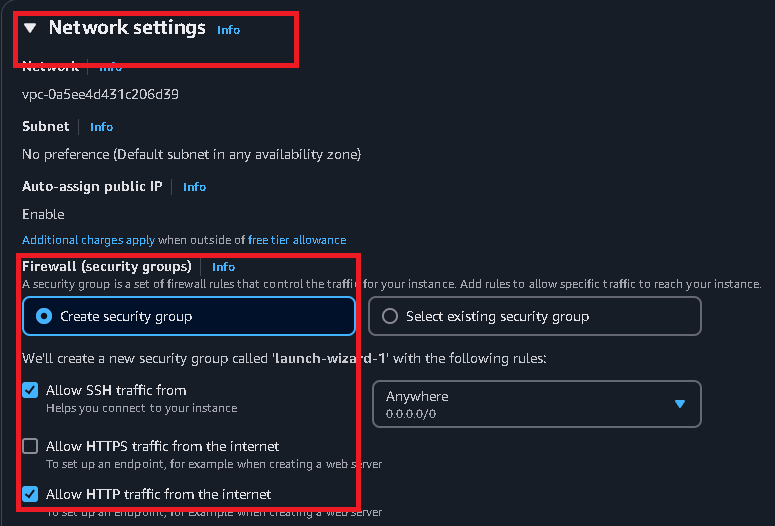
Under Network Settings:
Scroll down to Advanced Details and paste the following script in the User Data section:
#! /bin/bash
yum update -y
yum install httpd -y
systemctl start httpd
systemctl enable httpd
echo "<h1>Hello World from $(hostname -f)</h1>" > /var/www/html/index.html
Click Launch Instance.
In the Instances section, you should see your instance my_web_server running.
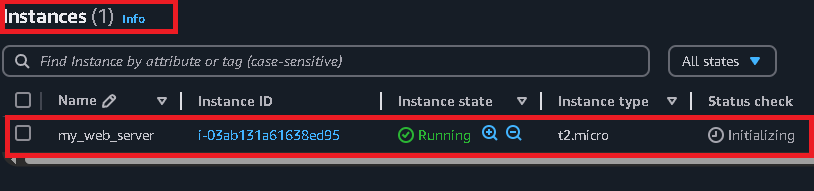
Copy the Public IP Address of your instance and paste it into your browser (e.g., http://<public-ip>).
You should see: Hello World from <hostname>.
Ping your instance to ensure it’s reachable:
ping <public-ip>If the ping fails, update your security group to allow ICMP traffic.

Use the scp command to upload your website files:
scp -i my_web_server_ec2.pem -r /path/to/your/website/* ec2-user@<public-ip>:/var/www/html/
SSH into your instance and extract the files:
ssh -i my_web_server_ec2.pem ec2-user@<public-ip>
cd /var/www/html
sudo tar -xzf myweb4.gz.tar .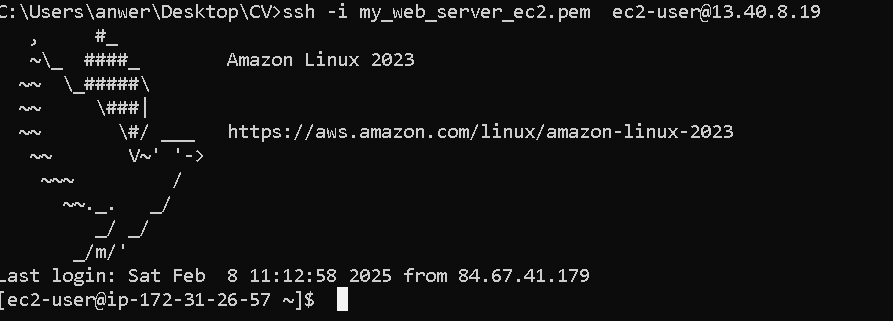
To avoid losing your public IP when the instance stops:
Release the Elastic IP when not in use to avoid charges.